Showing posts with label Tutorials. Show all posts

August 9, 2012

DIY: Personalized Phone Case

My fancy new phone case

My daughter, E, is a coloring machine.  In fact, as I write this, she is sitting next to me coloring away as we listen to audio stories, a daily occurrence.  But what to do with all the lovely pictures I receive?  I have some hung in my studio for color inspiration (and, well, pure happiness).  There are others in our main living area and in the kids' bedroom.  But there are many other pictures that pile up. 

On another note, I've been looking for a cover for my phone for many months now.  I have been working on a cross-stitch case, but I'm painfully slow and as much as I try to like it (since I love the idea of cross stitch) I get bored quickly. 

In an Ah-Hah! moment (and after seeing this on Pinterest) I decided to combine my need for a phone case with my love of E's art. 

All you need is some art you don't mind cutting, a clear case, and your phone.

Trace the outline of your clear case onto the blank side of the art you have chosen to use.

Cut out the art just a touch smaller than the case (don't forget the camera hole) - look, a perfect fit!

Snap the cover on and presto, a new case and a new customizable look

A beautiful phone cover that makes E feel pretty proud too (she likes to show me my own phone and comment on how colorful and "love-a-ly"it looks).  I can't wait to make some more!


Have you had any "ah-hah" creations lately?

Stay creative,
A

**


Pin It

February 18, 2011

Tutorial: Tissue Painted Windows

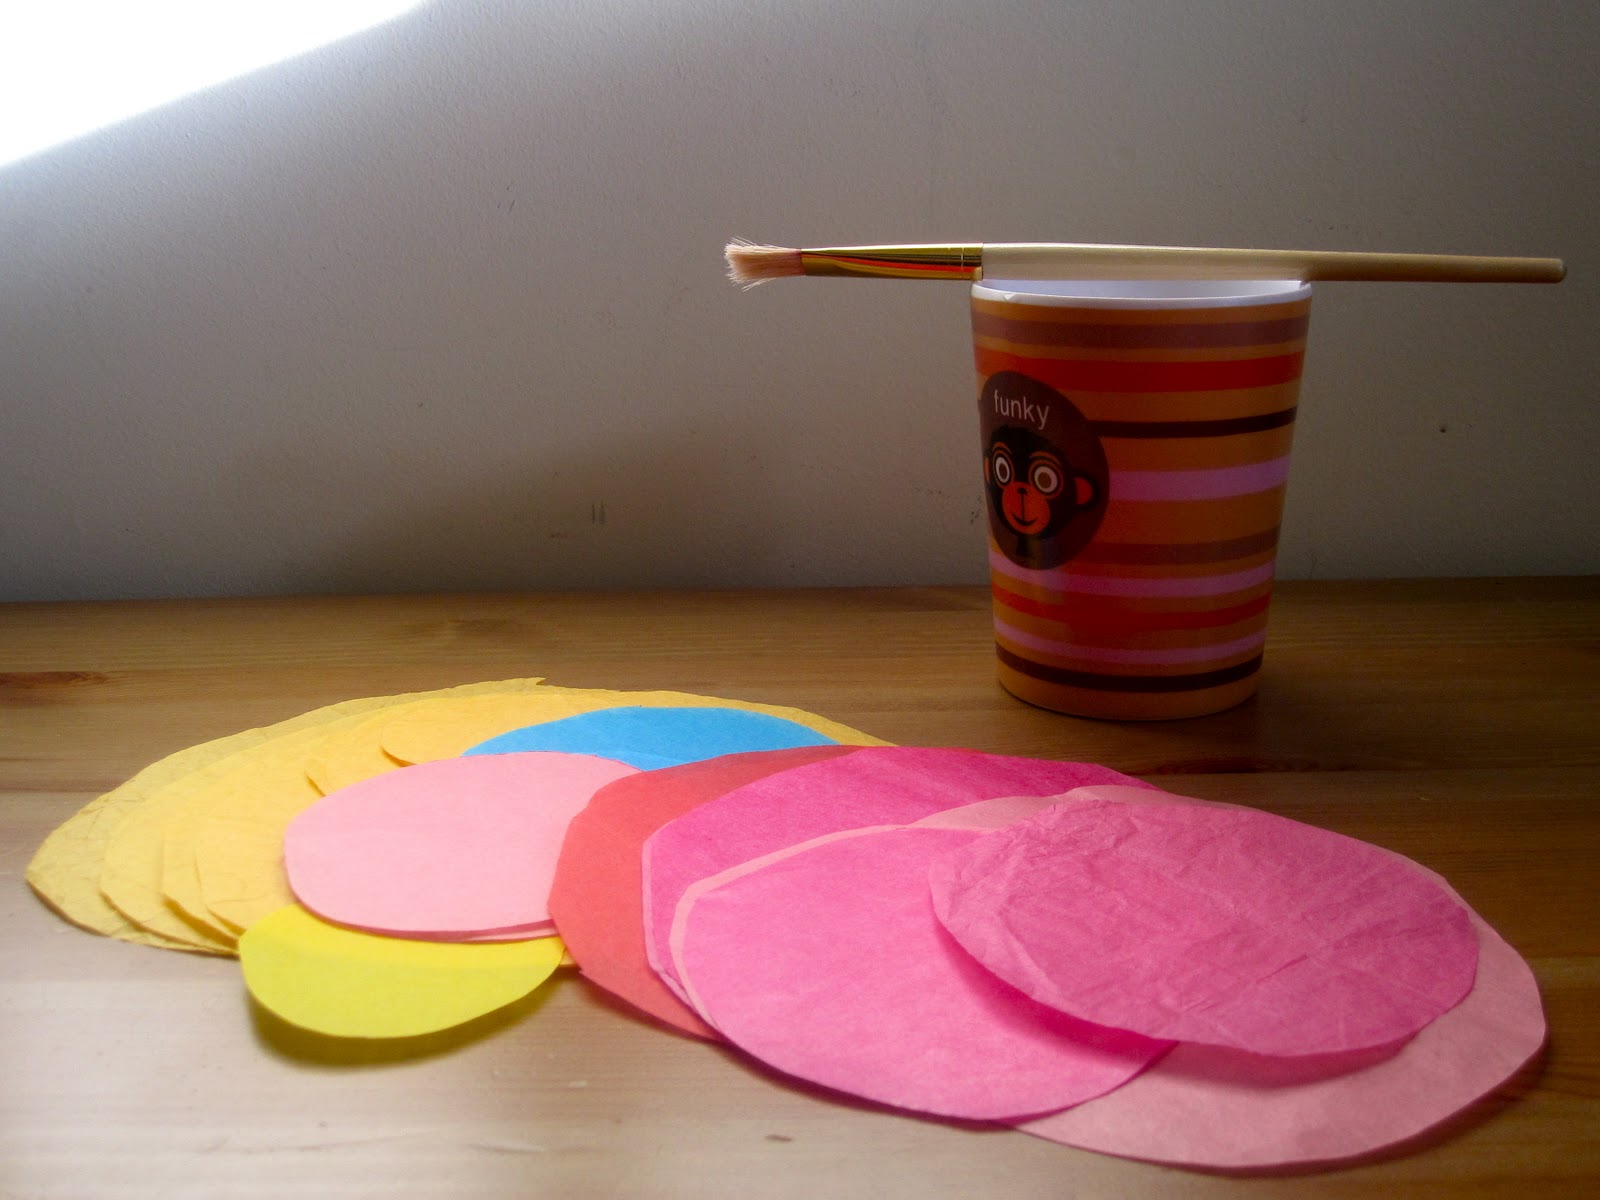
Pretty window circles - a glimpse at tomorrow's post...

Though the temperature has been unseasonably warm over the past few days (melting the snow - hooray!) the skies have not exactly been sunny and blue.  A pretty day here or there, but otherwise it's gray skies all the way.  A few weeks ago I posted about making an ice bunting, and I was amazed at what a difference it made!  I hung it out our back window - a window I look through dozens of times a day since it's located at the back of our one main hallway.  Once the bunting melted it was back to the same, boring gray-and-brown I was sadly getting used to...it was time to bring some color back into our window this week!  Feeling a creative impulse, I decided to use what I had on hand.  Now our window make me smile every one of the million times I see it each day!! 


This easy project took about 15 minutes, but may take you longer or shorter depending on your window size, complexity, and whether or not you have a little one "helping." 

Supplies:
- tissue paper
- water
- Elmer's glue
- paintbrush
- scissors


To-do:
The tissue paper can be from packages you've received or from the store.  Plan out what colors and shape you'd like and cut out your pieces.  Also keep in mind what they will look like when layered!  Mix a bit of glue in with your water - now I just poured some in and didn't measure, but I'd estimate the ratio is 1 part glue to 4 parts water.  


Now the easy and fun part - just use the water mix to "paint" your paper onto the window.  


They will take on a pretty semi-translucent look and dry in about 10 minutes.  Once dry, just take a wet rag and clean up your edges, and voila! You're done!!  You can leave your new design up for as long as you would like...and when you are ready to look at something else (like springtime), just use a warm, wet rag to clean it all off.


The beauty of this project is that you can make it as sophisticated as you want.  I think this would be lovely on a bathroom window, using small dots and only white paper.  This could also be brilliant in a child's room with colorful balloons floating up to the sky (ooooh, I may try that one!!)  You can also get all your supplies ready and have your kiddo work on this project.  Really, the sky and your imagination (oh, and your window size) is the limit!!  

P.S. If you do beautify one (or more) of your own windows, please share - I'd love to see what you come up with!
Pin It

February 15, 2011

Tutorial: Lovely Baby Rags

Newly-binded baby rags!!

When E was an infant and I seemed to have a baby rag over my shoulder or stuffed in my back pocket at all times!  We didn't get any fancy rags because, well, they are rags after all, made for wiping and cleaning (though used for much more, including stand-in diaper when I was caught without a spare diaper liner...a common casualty of never having a designated baby bag!) But when E was little I was too busy being overwhelmed and slogging through new-mommyhood and didn't have the time/energy/creative brain power to put towards such a trivial thing.  Fast forward a year and Hark! I have time!  (Oh glorious naps - cleaning shmeaning, I'd rather be creating!!)  So I decided to do up our baby rags two ways...

Soft baby rags *before*

This group of burp cloths are actually organic cotton cloth diapers, a baby gift from some good friends, and with all the washing they have been through, these cloths are super soft!  I didn't want to lessen the usable space, so I decided to make my own bias tape (here's a tutorial on how you can too) using pretty fabric scraps. 

Soft baby rags *after*

Pile of pretty rags

I love love this fabric, especially the flowers, and am happy that it is gender-neutral enough that boy or girl, our next child will be cleaned up in style!!

Utilitarian baby rags *before*

My second group of burp cloths was not so soft - this was my utilitarian bunch that gets the job done.

Utilitarian baby rags *after*

The fabric is thinner and a bit more coarse, as well as a lot less even, so I decided to go the potato-print route.  This had the added bonus of covering existing stains!! 

Utilitarian baby rags prettified!

Pretty potato patterns

I again tried to keep most of the pattern on the outside, so that the inside portion of the cloth could be used for wiping and what-not. 

Potato prints

Potato prints are easy-peasy:
1.) cut away the bits of potato you don't want printed
2.) dip in a bit of fabric paint and stamp away. 

I would recommend a basic design for a greater impact.

The irony of these pretty baby rags is that after I finished, the paint was dry and the pictures taken, I folded them up and put them into storage for our next little one, whenever that may be.  In the meantime, I plan on doing some similar jazzing to my plain white dish towels - FUN!!!
Pin It

January 24, 2011

Brrrr - Ice Bunting!!


Last Friday the high temperature in Chicago was 9F degrees.  If you ask me, that's not a temperature, that's a child's age!  Needless to say, we were not spending a lot of time outside last week.  To make things worse it was gray, gray, gray out!  So when I came across Two Chick's and a Hen's awesome idea for a colorful ice bunting, I thought, "Frozen fingers be you-know-what, I'm making it!"  and I set about gathering the needed supplies - molds for the ice, food coloring and twine.
(bunting in the night light)

Some thoughts on supplies... 
- The twine I used was not synthetic, or soft, and when dipped into the water prior to freezing started to untwist itself, inadvertently dipping into surrounding molds.  Very annoying!  Also, because of the rough nature of the twine my fingers got pretty raw braiding and then tying on the ice charms.  I'd recommend using a synthetic (but strong!) string instead.

- Ice molds that worked well included: small Tupperware squares, caps that go over the top of a bottle or sippy cup, and the tops of circular tin lip balm containers (that were rubbed with the residual balm - this is key for getting the ice out of such a small receptacle!)

- Ice molds that did not work included: film canisters (too small and deep), hard plastic cups (wouldn't release the ice), the top of the the lip balm containers without any balm (the ice smashed when I tried to release it!)


The way our deck is set up, there was no way for me to hang the bunting alone and without a ladder (and in a place where we would not have to duck under it every time we go in and out...which for me, is several times a day!)  I decided to hang two rows of bunting in the back window - it's such a bright and cheery sight!  It's been up now for nearly 5 days and still going strong.  We have not had a day above freezing and I hope to have it around for a while longer...and hey, if it does melt, this project took me about an hour, so I could easily make another!!

(pretty view in an otherwise very gray and brown winter world!)
Pin It

November 16, 2010

*Before & After* Painted Step-stool


Last week was the last of our "nice" days (as in warm days).  One afternoon I decided to throw open the windows and redo a step-stool.

(Before - ick!)
Here's the step-stool before.  I picked it up in the "returned items" section of Ikea two years ago, and it has been spending most of the time since then outside as a plant stand.  Now it's stained, dirty, and just generally yuck.

(After - yay!!)
After giving it a cleaning and light sanding, I whipped out some blue and yellow paint samples and a can of olive green returned paint (as in, the original recipient didn't feel it was quite the right shade). 

The green paint is an indoor/outdoor paint, so that was the first all-over layer.  I then painted the steps blue and edged them in a creamy-yellow. 

For a whimsical touch, I stamped the alphabet on the front of the steps and a few letters on top.

All in all, I'm really happy with how it turned out.  It's a bright touch in our kitchen, and best of all, E is now able to see what all the fuss is about during dinner prep!
Pin It

June 4, 2010

Fancy Crafty Shakers

Baby E loves shaking things recently - shaking her head, shaking her arms, and especially shaking things that make noise.  So today I decided to fancy up some old medicine and spice bottles I had been saving for this very reason!  This is a great way to recycle old containers as well as fabric scraps, ribbons, and such that you may have lying around.  All you need is a hot glue gun, something to make noise (I used different sized beans and rice), and some scissors.

Step one: Gather your supplies...


This is a good time to whip out all that ribbon you have lying around or any ribbon you have saved from presents you have received in the past (come now, I must not be the only person who saves my ribbon!)


Along with fabric scraps, I also chose to add some lace from my grandmother's (extensive) collection - it gives the bottles both an extra fancy touch, as well as different textures.


Different sizes of dry goods make different noises - I used rice, black beans and sesame seeds.


Step two: Fill your bottles...


Step 3: Decorate!!!


Step four: Find a little one to appreciate your masterpieces...

I had fun making them - E had fun shaking them!!! Pin It
Related Posts Plugin for WordPress, Blogger...